Sequin Flowers
I have been asked to share how I did the sequin flowers. This design came from an Aussie Magazine "Embroidery, Beading and Cross stitch" Vol 12 no7. I apologise for the quality of some of the pics, still trying to work out that little flower closeup function! Here is the first pic. You need those cupped sequins, and beads. The two black beads are the centre of the flower, so bring your needle up where you would like the centre of you flower to be. Thread on the needle in this order - 2 beads, sequin cupped toward eye of needle, sequin cupped toward point of needle, 1 bead, sequin cupped toward eye of needle, sequin cupped toward point of needle. It is important to get the direction right to get the dimensional effect.
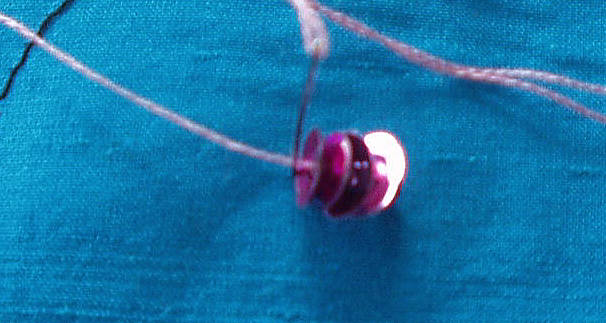 Pic 2. I push everything toward the fabric so it is pushed together fairly snug. Take needle back down thru fabric.
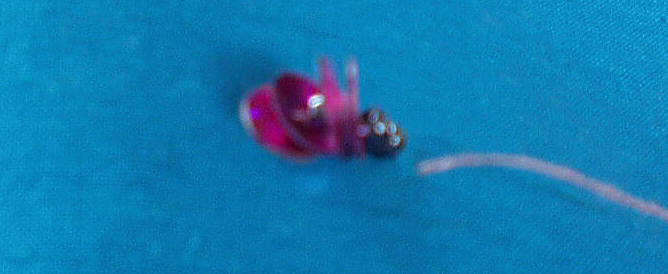 Pic 3. I then do the opposite petal. I have left a small gap, enough to put a contrasting bead for the flower centre.
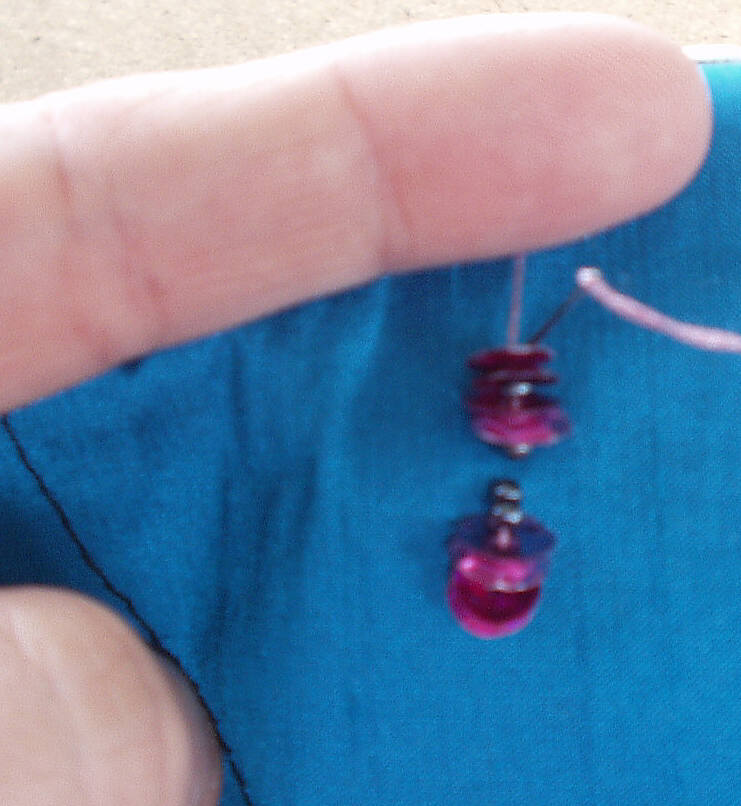 Thread the beads and sequins in the same order. Repeat steps until you have 6 petals. Below is the completed flower. I will put a wee pearl in the centre of this one.
You could probably experiment with the flat sequins, and put a bead between each sequin to give it the dimension. You can't tell by the pic, but I have used darker sequins on the bottom 2 and lighter for the top two.
I hope I haven't done wrong by passing these instructions on. I've credited the mag which is what I believe my obligation to be. If anyone has a huge problem, then contact me privately please...otherwise enjoy. I look forward to seeing what you come up with.


18 comments:
Thank you very much for your instruction. The photos and your explanation are perfect!! I will try them.
Thanks, that was very helpful I had imagined something entirely different! The pictures are good!
Thank you for the instructions with pictures. Now I "get it".
What a great way to use more sequins.
Thank you for the instructions, I'll try soon, the flower is very cute
Thanks for the 'how to', Jo. I've been wondering what I can do with all of my sequins. Gerry
I love this flower I'm going to have to try this too!
How neat! Thank you for sharing this technique! I'm gonna definately have to try this! It's a great way to use up some of the sequins I have! ;-)
You impress me. I’m going to try this as well. (when I find the time) Life is to busy. You’re instructions and pictures are brilliant to teach others like me. Thank you.
Thank you so much, I've been looking for information on how to make these. Would you happen to know where a person could buy these already made at a reasonalbe price? Thanks again!!!!
united states, I have not seen anything similar for sale, I'm sorry. They are really quick to make up though, so give it a go.
One CQer had something similar that she said came from a ribbon type thing. I am also in New Zealand, so anything reasonable here would probably not be reasonable for you!
I saw your flower some time ago, I saved the link and now I´m going to try it (on a bauble bag). Thank you very much for the photos!
I will have to try this on my next CQ needlepoint piece - will credit the magazine and you, of course. What a pretty thing!!
I like your flowers but I could not be bothered with having to buy all the sequins and beads. Once I had priced it out it was not worth it.
I found the ones on SequinFlowers.com are really great and she custom makes them for you if you have a specific color preference.
I got a whole lot for my daughter's tu-tu from her. I wish I could post a picture!
Thank You this is really a wonderful tutorial. I just noticed you posted this a few years ago!
its very nice.thank u very much
Wow!!! It´s fast, easy and amazing.
Thank you for lesson.very interesting.
This is a great technique. This is a fabulous flower. I need to make some of these!
Post a Comment